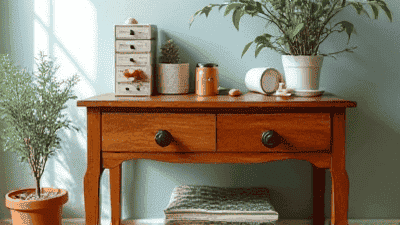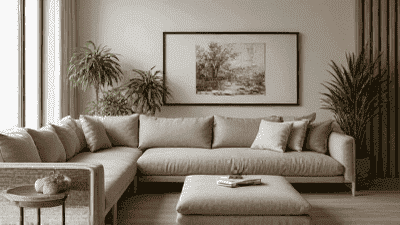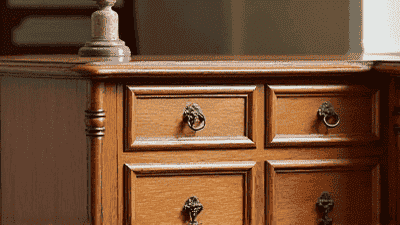
Antique furniture possesses a unique allure, embodying history, artistry, and craftsmanship. Each piece tells a story and carries the marks of time, enhancing its character through the beautiful patina developed over years of use. For vintage enthusiasts and collectors, restoring antique furniture is not merely about making it look new again; it's about preserving its original charm and patina while ensuring its longevity. In this comprehensive guide, we will explore various techniques for restoring antique furniture that honor its history while maintaining its aesthetic and structural integrity.
Before attempting any restoration work, it’s essential to understand what constitutes antique furniture and the factors that make it unique.
Generally, antique furniture refers to pieces that are at least 100 years old. This definition can vary among collectors and experts, who may consider furniture made from specific periods or styles, such as Victorian, Edwardian, or Art Deco, as antiques.
Antiques are valued not only for their age but also for their craftsmanship, materials, historical significance, and rarity. This can include:
Craftsmanship: Many antiques feature intricate workmanship that showcases the skills of artisans from their respective time periods.
Materials: Antique furniture often utilizes high-quality, solid wood species that are harder to find in modern furniture production.
Historical Context: Some pieces may have significance related to specific historical events, movements, or cultural practices, further increasing their value.
Before embarking on restoration, consider the following:
Current Condition: Assess the piece’s overall condition. Is it structurally sound, or does it have significant damage? Understanding the extent of repairs needed will guide your restoration efforts.
Original Finish: Analyze the original finish to determine whether it is worth preserving. Removing previous layers of paint, varnish, or lacquer may affect the piece’s value.
Authenticity: If the piece is highly valuable, consult with an expert to determine the best approach. Restoration techniques may vary significantly based on the status and worth of the item.
Before starting the restoration process, gather the necessary tools and supplies. Here is a basic list:
Now that you have an understanding of the necessary tools and some key considerations, let’s discuss the steps involved in restoring antique furniture while preserving its charm.
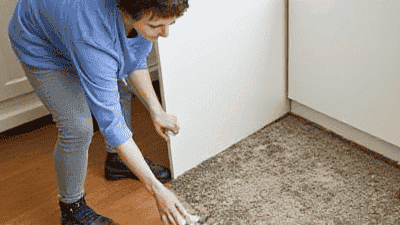
Cleaning is the first essential step in the restoration process. Removing dirt, grime, and old polish will prepare the piece for deeper restoration work.
Use a soft cloth to dust the entire piece thoroughly. Pay special attention to crevices and intricate carvings that can accumulate dust over time. Use a vacuum cleaner with a brush attachment for hard-to-reach areas.
Prepare a mixture of mild soap and water. Dampen a soft cloth with the solution and gently wipe the surface of the furniture. Be cautious not to oversaturate the wood, as excessive moisture can cause damage. For sticky residues, you can use denatured alcohol on a cloth, but perform a spot test first to ensure it does not harm the finish.
After cleaning, address any leftover soap with a clean, damp cloth to ensure no residue is left. Finally, dry the piece thoroughly with a soft, dry cloth.
Examine the furniture for any structural damage or weak joints. It’s important to address these issues before moving on to aesthetic restorations.
For furniture with loose joints, use wood glue to reattach parts that have come apart. Disassemble the loose areas gently if possible and apply glue, clamping them together until dry.
For broken components, consider using wood filler to repair smaller gaps and cracks. If pieces are missing entirely, recreate the missing part using a matching wood species. This may require the skills of a woodworker for intricate or ornate pieces.
Check all hardware, including hinges, knobs, and drawer slides. Replace or tighten any loose hardware components and clean metal parts with a gentle cleaner to remove tarnish.
The finish on an antique piece is often as crucial to its overall charm as the wood itself. Whether you choose to restore, refinish, or simply clean the original finish depends on the condition of the piece and your restoration goals.
If the current finish is damaged or peeling, you may need to remove it:
Chemical Strippers: Use a chemical stripper if the finish is thick. Follow the manufacturer’s directions carefully. Apply it to the surface, wait for it to work, and then scrape off the old finish with a putty knife.
Sanding: For minor issues, sanding may suffice. Start with coarse sandpaper and gradually progress to finer grits, always sanding with the grain to minimize scratches.
Avoiding Damage: Take care not to sand too aggressively, which could damage the wood underneath.
If the original finish is in good shape, you may choose to keep it and enhance its appearance through cleaning and conditioning:
Wood Polish: Apply a quality furniture polish to enhance shine and provide a protective layer.
Oil or Wax: Consider applying a wood oil or wax to nourish the wood and bring out its natural luster. This method can provide a beautiful, rich finish without removing the original patina.
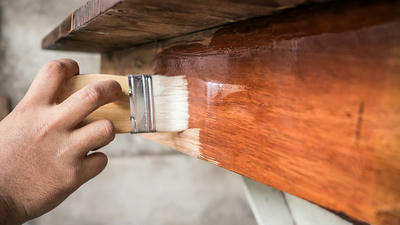
If you have removed the old finish or if the wood requires rejuvenation, applying a stain and sealant can enhance the aesthetic.
Choose a stain that complements the original color of the wood. Test it on an inconspicuous area to ensure you achieve the desired color. Keep in mind that wood stains can appear darker when wet, so allow test areas to dry fully before making a decision.
Use a clean brush or cloth to apply the stain evenly, following the wood grain. Allow it to sit according to the manufacturer’s instructions, then wipe off any excess with a clean cloth. Let the stain dry completely before proceeding.
Once the stain is dry, apply a protective finish:
Varnish: Choose a varnish or polyurethane suited for your project. Apply thin, even coats with a brush or sprayer. Allow each coat to dry thoroughly before applying subsequent layers, sanding lightly between coats for a smooth finish.
Wax Finish: If using wax, apply it with a clean cloth and buff to a high shine once it has dried to create a beautiful finish.
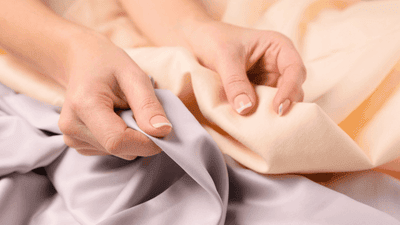
For furniture with upholstered components, restoring fabric or leather may be necessary to match the overall restoration:
Use removable covers or upholstery cleaners suitable for the fabric type. Spot treat stains promptly, and consider employing professionals for deep cleaning or significant repairs.
If the fabric is irreparably damaged, you may need to reupholster:
Selecting Fabric: Choose fabric that honors the piece’s style and period. Consider durability and ease of cleaning.
DIY vs Professional: Depending on your skills, you may choose to attempt reupholstering yourself or hire a professional for intricate work.
After completing your restoration work, take the time to add finishing touches that will enhance the overall presentation of the furniture.
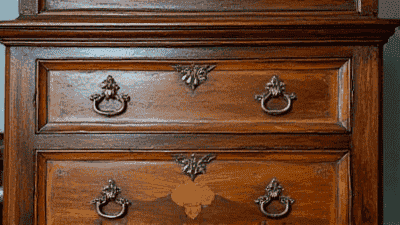
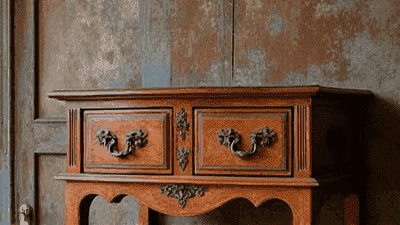
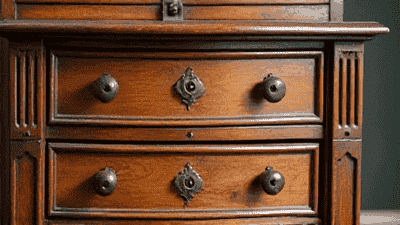
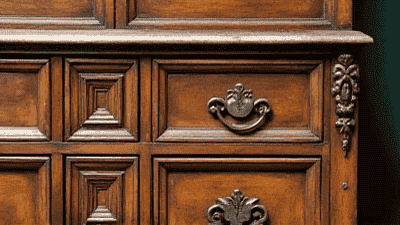
Consider adding decorative elements that suit the furniture’s era, such as antique hardware, new knobs, or vintage drawer pulls that respect the original style.
Furniture Pads: Use felt pads under the legs of chairs and tables to prevent scratches on floors and carpets.
Coasters and Trivets: Encourage the use of coasters and trivets to protect surfaces from heat or moisture.
Once you have restored your antique furniture, ongoing care is crucial to ensure it remains beautiful and functional for years to come.
Dust and clean furniture regularly to avoid dirt buildup. Use a microfiber cloth to remove dust and a damp (not wet) cloth for deeper cleans as needed.
Humidity Levels: Maintain a stable humidity level within your home. Sudden fluctuations can cause wooden pieces to swell or shrink. The ideal relative humidity is between 30 and 50 percent.
Temperature Control: Avoid placing furniture near heating vents or air conditioning units, which can dry out or warp wood.
Sunlight Exposure: Use curtains or shades to protect furniture from direct sunlight, which can fade colors and damage finishes over time.
Encourage gentle use of antique pieces. For example, discourage children from using antique furniture as play equipment or pets from jumping onto delicate surfaces.
Restoring antique furniture is not merely a preservation project; it is an opportunity to connect with history. Each piece carries stories of past lives and experiences that contribute to its character.
While restoring, consider documenting your project. Keep a journal of the restoration journey, noting the challenges faced and victories achieved. This record can become as valuable as the furniture itself, weaving your story into the tale of the piece.
While many restoration projects can be completed at home, there are instances where professional help may be the best option:
Valuable Pieces: If your antique furniture piece is an irreplaceable family heirloom or has significant value, consult an antique restoration expert before beginning any work.
Complex Restoration: For complicated repairs, such as intricate carvings, extensive upholstery work, or severe structural issues, skilled professionals possess the tools and expertise required for successful restoration.
Legal Considerations: In some instances, antique pieces may require specific permits or regulations for restoration, particularly when they have historical significance. Seeking professional guidance will ensure compliance.
Restoring antique furniture is a rewarding and fulfilling undertaking that celebrates history while preserving unique craftsmanship. By utilizing proper techniques and techniques, you can enhance the beauty of these treasured pieces while maintaining their charm and patina.
Whether by cleaning, repairing, or reupholstering, each step you take honors the craftsmanship of those who came before us and adds your own chapter to the story of the furniture. Embrace the journey of restoration, and your efforts will not only enrich your living space but will also keep history alive for future generations to appreciate. Your restored antique furniture will become more than just a functional piece; it will be a conversation starter and a legacy that reflects the artistry, craftsmanship, and spirit of the past.